Alright internet junkies, we’re going to cover in depth the exact process I used to set up my on person EDC bag. I’ve read a few of the tutorials out there, but there really isn’t a comprehensive guide to setup up an EDC bag. So, for those dedicated to perfecting their craft, we’ll be going over everything from concept to completion of your EDC loadout.
Table of Contents
Types of EDC Bags
You’re ready to make the commitment. Investing in an everyday carry bag seems the best way to stay prepared. There are two problems. First, you don’t know which bag to buy. Second, you don’t know what goes into an EDC bag. Ironically, you select the gear first and then decide what size and type of bag you’ll be getting.
Fundamentally, there are two different types of EDC bags. The first type of EDC bag is more commonly known as a bug out bag (B.O.B.) or shit hits the fan bag (S.H.T.F bag). The second type of EDC bag is the one you carry on you. For the purposes of this post, we’ll be focusing on the second type. However, the same principles can be applied to the other type of bag as well. Let’s look at how they differ.
Bug Out Bag/Shit Hits The Fan Bag
Primarily, the bug out style bag is an evacuation style bag. In the event of a catastrophic natural disaster (think Hurricane Florence) or cataclysmic event (think Red Dawn) you’ll need to evacuate. Abandoning the luxuries of home and taking to a less densely populated area. Often times, there will be specialized equipment setup for surviving these types of events in a bug out bag. An example would be something like a gas mask.
Bug out bags typically have some sort of survival supplies as well. They might include things you’d expect to see on a camping trip. Tents, tarps, fire starting materials, sleeping bag, and a compass or other non-digital navigation tool are all examples. Furthermore, bug out bags will have sustenance, food, and water, to help you survive in a rural atmosphere. Typically, they will have contingencies in place to aid in survival. Something like multiple ways to start a fire, or bottled water and water purification tablets.
Some people keep multiple bug out bags. For instance, they may have a small kit in their office desk drawer or keep a bug out bag in their vehicle. While the philosophies are similar and there may be overlap in the supplies, a BOB/SHTF is a set it and forget it type platform. Of course, you will change out supplies for fresh ones, but the loadout itself rarely changes.
On Person EDC Bag
A personal EDC bag is much more fluid. You will be changing out supplies from day to day as your needs grow or contract. You may have a core set of supplies you always want to carry with you, but the peripheries will be in flux.
Unlike the bug out bag loadout, your personal EDC loadout will focus more on providing solutions to problems you’ll encounter every day. Of course, there may come a time where your personal EDC bag could mean the difference between life and death. Preparedness is a core philosophy of both types of EDC bags.
Your EDC bag may contain survival tools, but it also contains items of convenience. Therein lies the difference between the two types of EDC bags. The focus of the BOB is solely on survival with minimal outside assistance. Your EDC bag compliments your lifestyle to provide you optimal solutions to problems, both simple and dire in nature.
Gather All Your EDC Items
In order to set up your EDC bag, you’ll need to gather all of the supplies you plan to carry with you on a given day. This list will likely grow as you become more accustomed to the EDC lifestyle. However, you will also be able to strip away the non-essentials as you build.
Here’s a general list of things you should include in your EDC arsenal:
- wallet
- cellphone
- keys
- cash/gift card
- watch
- computer
- computer charging cable
- cellphone charging cable
- battery pack – in case a power source is not readily available
- knife
- pen
- sharpie
- index cards/notepad
- water
- watch/GPS
Here’s a list of things you could potentially add as part of your EDC loadout:
- tourniquet
- aspirin
- ibuprofen
- additional layers or change of clothes
- multitool
- vice grips
- firearm/self-defense tools
- toiletries
- scissors (medical or otherwise)
- bandages
When creating your additional carry items try to imagine scenarios you’ve been in, heard about, or read where you face a problem. Take note any tools or devices that would have served you well in solving the issue. Are there any items that show up in multiple scenarios? These are likely great candidates to add to your EDC arsenal. Don’t worry about sizing or weight just yet. We’ll cover that in the next section. For now, gather anything and everything you think will be useful.
Group Items By Carrying Method
Alright, so you’ve got a pile of stuff you think might be useful for everyday situations. If you’ve done this right, you’re probably thinking “there’s no way this will all fit in a backpack or bag.” You’re absolutely right. Now you’ll have to break things down into their respective carry methods. The three main methods of carrying are on your person, in a bag, and in your transportation (a.k.a. vehicle).
On Person Carry Method
Carrying on your person means these items never leave. Unless you set them down after use, they will always be with you. These items should be incredibly useful, serve multiple purposes, and be easily carried with your everyday clothes. Almost everyone has these items. If you take a look at our list above, a wallet, cellphone, and keys are all fine examples of on person carrying.
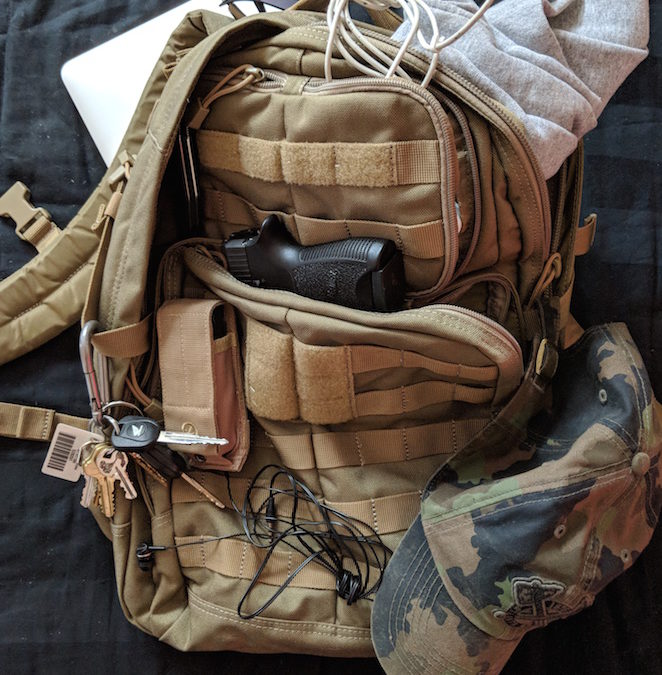
In addition to my wallet, cellphone, and keys, I have another set of on person EDC items. I carry a pocket knife, which is useful as both a cutting tool and potential self-defense weapon. A multitool, which because of its very construction can solve an abundance of problems. My firearm also accompanies me wherever I go. While its purpose is very focused, if I ever needed protection there isn’t a better tool, in my mind, that I’d rather have with me. If you’re looking for quality gear to include, I’ve outlined some of my personal favorites here.
I consider all of these items essential. Should you get separated from your pack, what items would you absolutely need to have access to? The answer to that question likely makes up a large part of your on person EDC carry items. You can set these items aside for now.
EDC Bag Carry Method
You’ll likely still have a large pile of tools, devices, and other items leftover. At this point, separate out any the items that you need to have access to in order to accomplish your daily routine, but that doesn’t fit on your person. This might include things like your work or personal computer, along with the charging cables.
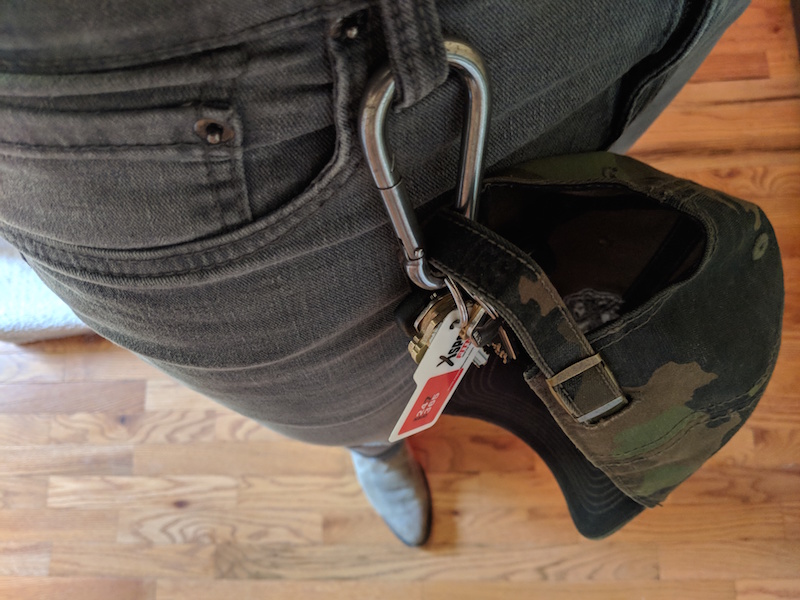
Now’s also a good time to think about any redundancies you’ll need. Maybe you have cash in your wallet (or everyday carry hat), but want to include some in your pack should your wallet ever get lost or stolen. I keep one of my Visa gift cards (A Christmas gift) in my pack along with some cash. In a pinch, I could use the gift card for Uber, at a gas pump, or any credit card only platform, and keep my cash available.
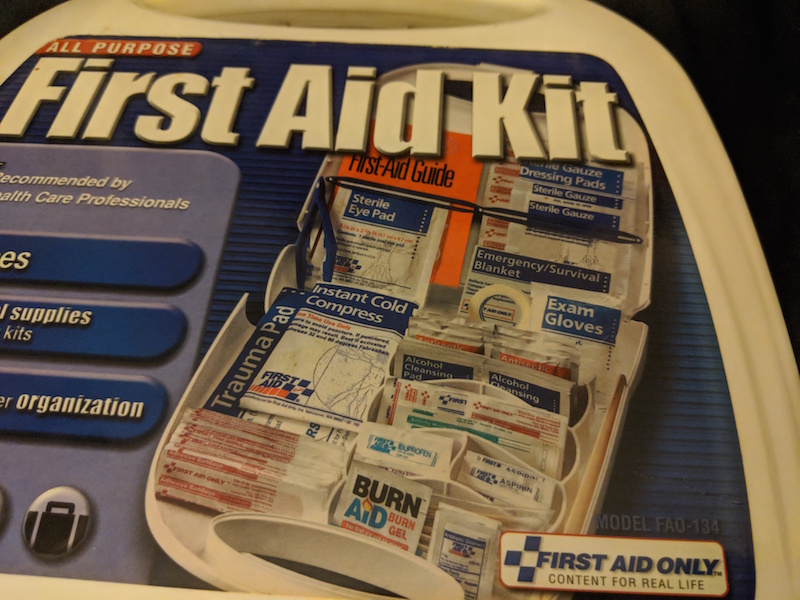
Next, think of the things that would be useful in an emergency situation. For me, this refers primarily to my everyday carry medical supplies. However, should I ever need to recharge my phone, I also include a charged battery power pack. Any tool that has multiple applications is preferable to specialized tools. Noticing a theme?
In Transportation Carry Method
Finally, we have the in-vehicle everyday carry bag. This platform may not be applicable to those who ride a motorcycle or take mass public transport on a regular basis. However, if you live in a rural area, or commute to work you may want to consider this type of bag. The contents of this are usually specialized tools, such as those meant for maintaining your vehicle.
Any items left will likely go into this type of bag. Even if they don’t apply specifically to emergency vehicle maintenance, any uniquely specialized tools can be added here if you deem them necessary. This type of bag more closely resembles the bug out bag, rather than your regular EDC bag. You can set these types of items aside.
Decide On Your EDC Bag
Finally, we’ve arrived at the point where we actually need to purchase a bag. Take stock of the items that you have set aside as your EDC bag contents. Make note of any dimensions that are pertinent, like laptop size. Any item that will take up significant space on its own should be accounted for. Once this is done, you’ll have an idea of the size of the bag you must have in order to accommodate your EDC items.
EDC Bag Sizing
Most backpacks are measured in the number of liters. While this is a good indicator of the quantity of material a bag can hold, I choose to view the actual bag dimensions when available. Once you’ve had the opportunity to test multiple bags, you’ll get a more accurate perspective on what the liter measurements mean. However, for assembling your first bag it’s best to look at length, width, and height dimensions to ensure proper fit of larger items.
Another thing people often neglect is the amount of free space you allow in your EDC pack. Your pack should not be filled to the point the zippers are going to burst. For one, it places undue stress on an already weak point of the pack. Second, it leaves no room for items you may pick up in your everyday travels. Finally, I explained that your EDC pack is fluid, and thus may be used for many different scenarios. You may need extra room for additional clothing, shoes, etc.
I’ve found that for the typical EDC bag, a 20-24 liter bag is sufficient to accommodate one day worth of activity. These types of packs can typically fit the essentials of everyday work life, as well as small weekend excursions. I chose a slightly larger pack which is 33 liters, because I will frequently travel out of town on the weekends, and so my EDC bag doubles as my luggage on these occasions. Check out the gear section for my recommendations for potential EDC bag selections.
EDC Bag Style
Once you’ve decided on your needs for sizing, you’ll need to decide on a style. Choosing whether you use a courier style bag or a backpack will depend on your personal flair and medical concerns. You’ll also need to consider whether your pack is tactical or covert.
Tactical vs. Covert
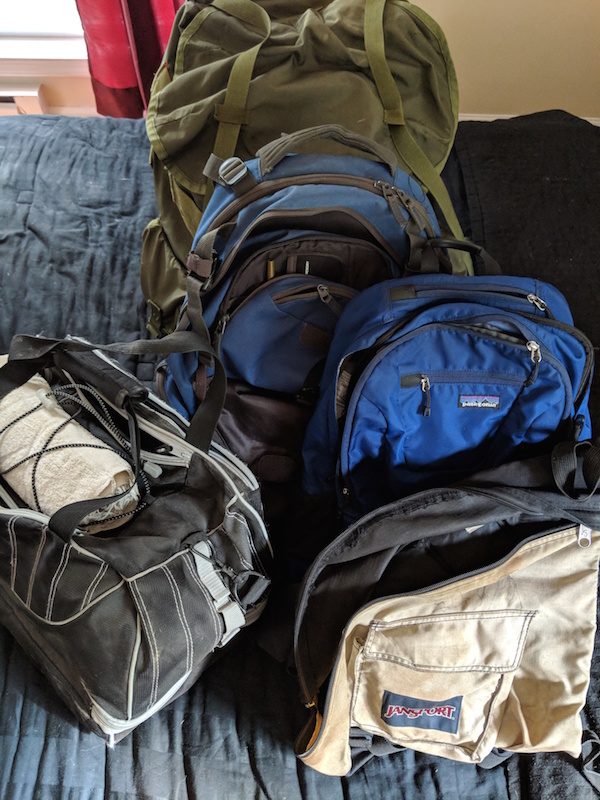
Covert option EDC packs maintain a civilian look and keep your ability to respond to situations relatively low key. These bags are fine bags, and I own a few. Covert options are typically only applicable for day pack situations. My EDC pack serves as a multiple purpose bag so this was not an option for me. Also, I’ve noticed that the covert backpacks are not very durable and have many points of failure that I’ll cover in another section.
Generally speaking, I’m not a fan of tactical style clothing or accessories. Beyond the stigma of being labeled “tacti-cool”, it tends to advertise things like concealed carrying of a weapon (CCW). However, for my EDC pack, I did choose a tactical style backpack. The molle system allows me to add and remove storage/items to my pack depending on my needs. This is both quick and easy. Tactical style packs are also usually made of more durable materials than their covert counterparts.
EDC Bag Materials and Construction
Since your EDC pack is going to accompany you through a plethora of environments and scenarios, I highly recommend you get a pack from a reputable company. I choose the 5.11 Tactical Rush24 pack for my EDC needs. Choosing materials that are rated to withstand the environments you plan to frequent is the determining factor of the materials your pack will consist of.
Because I am constantly out of town, on the go, in urban and rural environments my pack is constructed with 1050D nylon. This material is water repellent, which is great considering my choice of activities (including riding a motorcycle). Durability is a must, and this fabric fits the bill. It is also heavier and stiffer than other materials. You’ll need to decide for yourself what suits you best.
Medical Considerations When Choosing A Pack
Because each person has different needs, their choice in EDC pack varies greatly. However, one key element that is often overlooked is the medical needs of the user. I’m not talking about the contents of the pack, but whether there are limiting factors in your medical history that prevent you from using one style of bag over another.
Below are a list of ailments and corresponding bag choices to help exemplify my point:
- lower lumbar injuries – consider backpacks with integrated (or modular) lower lumbar support
- shoulder injuries – consider shoulder (courier/messenger) or sling bags to place the load on a good shoulder
- neck injuries – consider briefcase style bags. You’ll need to dedicate a hand to carry your pack but it will save your neck
EDC Bag Setup: Organize and Modularize
Now you have your pack, and you have what goes in it. Seems relatively simple what to do next. Throw everything in your pack, and be on your way, right? Sorry, doing things right is rarely ever that easy. While we are at the point where we’ll be packing up your EDC bag, there are some things you need to consider, like inventory, labels, and making your pack modular.
Group Similar EDC Items Together
First, you’ll need to group items similar in nature together. This can be items that serve a similar function, like your charging cables and battery packs. Another way to group them is by category, which I have the most success with. My medical gear is all grouped and packaged together. If you’re looking for tips on your own medical kit, take a look at this article. All of my survival supplies, like my torch (a.k.a flashlight), lighters, and LifeStraw also share space.
Once you’ve figured out your groupings, it’s time to package them up. You can do this using small packs you have laying around, use Ziploc freezer bags to keep them waterproof, or using molle pouches. You can even use a combination (e.g. Ziploc bags within a molle pouch) if the items calls for it. I’m a big fan of making things modular. This way you can add or remove items for when the scenario calls for them. An example of this is my toiletries kit, which is necessary when I’m camping or going out of town for the weekend but is useless for my Monday-Friday job.
Don’t Forget To Label
While not every case within your EDC loadout needs to be labeled extensively, a simple icon like a “⇔” on your electronic supplies kit will come in handy. This is great for packing and unpacking quickly since it’s easy to identify the difference between to cases without having to open it up.
For highly specialized cases, like survival and medical, I recommend adding an inventory list or diagram of contents. First, this allows you to know exactly what is contained within your medical, and the quantity you have available. Second, it allows you to instruct someone else on where to find a particular item in an emergency situation.
For instance, you may be keeping the pressure on a wound and need someone to locate your battle dressing. The person who is assisting you may not know what that is. However, telling them to look in the pack with the little “⊕” and look at the diagram for the corresponding number of battle dressing will make your chances of success far greater. God forbid, but if you yourself ever end up needing the items in your medical kit, you’ll want to be able to instruct someone as easily as possible!
Pack Everything Up
Now you’re finally ready to piece it all together and have a functional, organized, and stocked EDC pack. Place the items that you are most likely to use in easy to access areas. Items that are less likely to be used can be buried further in your pack, or in less conspicuous places. At this point, if you’ve planned accordingly everything should fit without issue, with room to spare. Congratulations you’ve now set up an EDC bag!
Use Case Scenario Testing
Now it’s time to put your pack through the wringer. Take it with you to work, and note anything that caused an issue with day to day usage. Try taking your pack on a hike or trip. This will allow you to test how modular your pack is. Was there anything you needed and didn’t have? Make notes as you go along. As I said before, an EDC bag is fluid and constantly changing. Making changes to your core kit is also part of the EDC experience. Feel free to check back with this guide in a few months or whenever you make changes.
Maintaining Your EDC Bag
There are three things that you need to do to ensure your EDC bag isn’t compromised. First, check common points of failure. Second, ensure any expired items are discarded and replaced with viable materials. Third, continuously evaluate your bag for potential improvements to your kit and your EDC hardware.
Common Points of Failure On Bags: Things To Avoid and Check
I’ve carried a variety of bags throughout the years. It’s taken me quite some time to settle on my latest EDC backpack. However, I’ve gained some valuable knowledge throughout my years. The biggest takeaway in my experience has been common points of failure. Manufacturers come up with all kinds of clever ideas to market a bag. Some of them are great, and others just look good on paper. Others still are necessary items that tend to break but are common among all of the packs I’ve owned.
Buckles, Zippers, and Seams
If you’ve ever owned a backpack, you’re familiar with these points of failure. When the zipper doesn’t stay zipped or rogue threads/pieces of fabric get stuck, it renders a pocket useless. Over-packing a bag can also cause both seams and zippers to fail. Often times, the bag is no longer usable or is relegated to the closet until you need a bag you don’t care about losing for a random task. Buckles, particularly the plastic variety are prone to fail. If you have heavy items they can crack the buckle when the bag is overstuffed and dropped on the ground. I prefer snap buttons and/or drawstrings to expand and contract compartments on a bag.
Mesh Enclosures
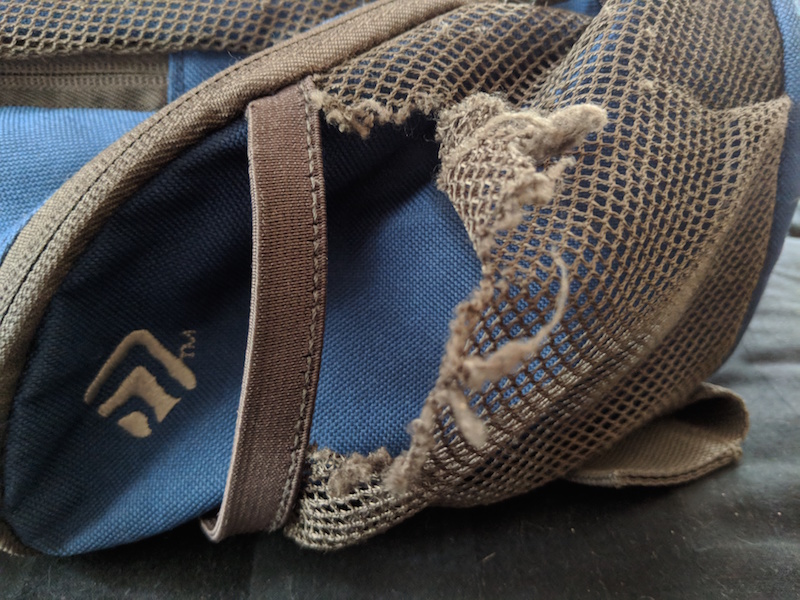
This had to be the brainchild of the manufacturers because I have had so many of these little mesh compartments fail. Typically they’re tacked on to the outside of a pack as an almost obvious afterthought. While a heavy duty nylon or rope mesh may work, typically this isn’t used during construction. The elastic used at the top of these mesh pockets is also prone to stretching out over time. Anything with a stiff edge can cause the mesh to tear, clips on knives, your keys, just about anything makes these little more than ornamental.
“Stuff It” Compartments
While these types of pockets can be handy for pliable items, overall I’ve found them to be more trouble than they are worth. Typically, they attach using the flimsy plastic buckles which can break. Furthermore, stuffing your windbreaker into this pocket and forgetting about the wallet, cellphone, knife, etc. you left in the pocket is a quick way to lose them. These pockets can be exploited by pickpockets easily. I’m generally not a fan and think the concept itself is a point of failure on an EDC.
Check The Expiration
Often times, people will forget to flush out their inventory. They either forget that an item has an expiration date, or assume it’s good as long as it hasn’t been opened. This is a gamble you are more than welcome to take. I’d rather spend a few extra dollars on something that might save my life instead of gambling on the expired version. Typically, items you have to watch are in your medical kit, but some survival supplies also fit into this category. On that note, check your inventory periodically just to make sure packaging and supplies haven’t been compromised by water or other environmental factors.
ABC’s: Always Be Checking
While your pack should last you quite some time assuming you’ve followed this guide, it’s not impervious to the perils of time and usage. Beyond the points of failure we’ve covered, companies are constantly striving to provide new and improved models. Most times, these enhancements are purely cosmetic, but every once in a while something revolutionary will come along. Evaluate whether your pack needs an upgrade, or if you could benefit from new features. Use caution, as you’ll want something that’s real world tested. Don’t be the guinea pig…that’s my job!
Parting Shots
There you have it, folks. You’ve reached the end of the comprehensive EDC bag setup and maintenance guide. If you’re looking for my recommendations on packs, check out the recommended gear section. While you’re there, check out some of the other EDC items in there. It’s a virtual treasure trove of gear. Also, if you’ve got any questions, concerns, or feel I’ve left out important information I’d love for you to leave a comment.
